Follow our step-by-step guide to help you through the process of setting up Google Analytics 4 in Shopify.
Setting up Google Analytics 4 (GA4) correctly on Shopify is crucial because it allows you to accurately track user behaviour, conversions, and marketing performance. By integrating GA4 with your store, you can analyse critical metrics like traffic sources, customer journey paths, and eCommerce purchases.
This data enables you to make informed decisions about marketing strategies, ad spending, and product offerings. Proper setup also facilitates better targeting through Google Ads, optimizing your ad campaigns and ROI. Without accurate tracking, you risk missing valuable insights into what’s driving your sales and growth.
Is there compliance surrounding setting up GA4 tracking in Shopify?
There are compliance considerations when setting up Google Analytics 4 on Shopify. As an online store owner, you must adhere to data privacy laws like the GDPR (General Data Protection Regulation) in Europe and CCPA (California Consumer Privacy Act) in the US. These laws require transparent data collection practices and user consent for tracking cookies. Additionally, you should review your store’s privacy policy to inform customers about data collection methods, and make sure users have control over their data choices. Missteps in compliance can lead to legal risks and fines.
How to set up Google Analytics 4 in Shopify – Step by Step
1. Create a Google Analytics Account
Before we begin our step-by-step guide to setting up GA4 and Shopify, you need to have a Google Analytics account. If you already use Google products, such as Gmail or Ads, then you can use the same account for Google Analytics.
2. Create or use an existing Google Analytics 4 property
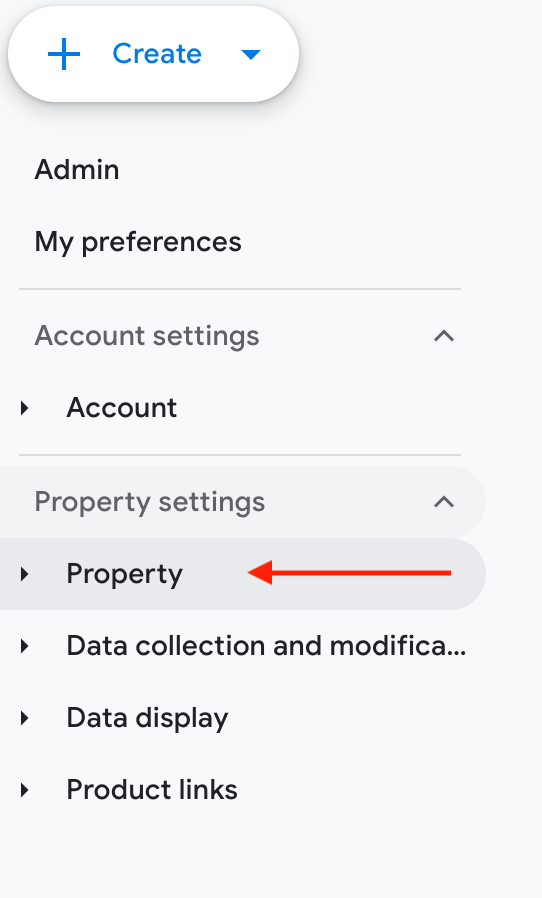
To activate Google Analytics 4 in your Shopify store, create a new GA4 property or use an existing property you have previously made. If you are using an existing property, you will need to make sure you disable the tracking already set up. We recommend you do this after you have set up the Shopify Plugin.
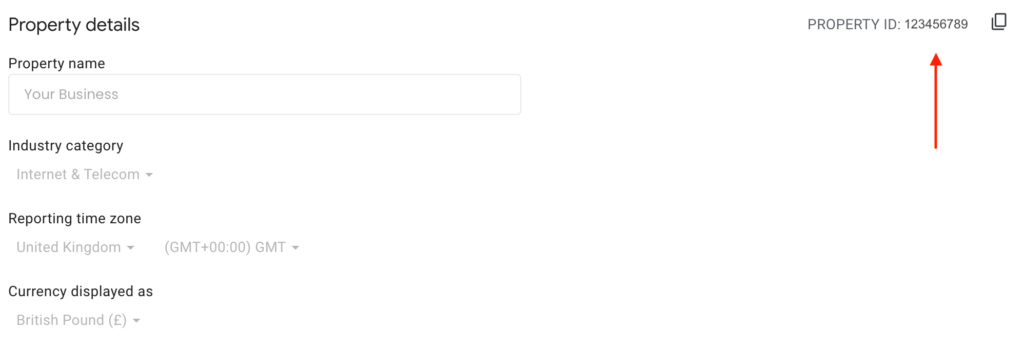
After identifying your GA4 property, you need to create a web data stream. Make a note of the Tag ID because you’ll use it in Step 3.
3. Add Google Analytics 4 tags
If you don’t have the Google & YouTube channel installed in your Shopify Store, then you’re prompted to install it during the set-up process for your GA4 tags. You don’t have to connect to the Google Merchant Centre to complete your GA4 tags setup process.
Steps:
From your Shopify admin, got go to Online store > Preferences.
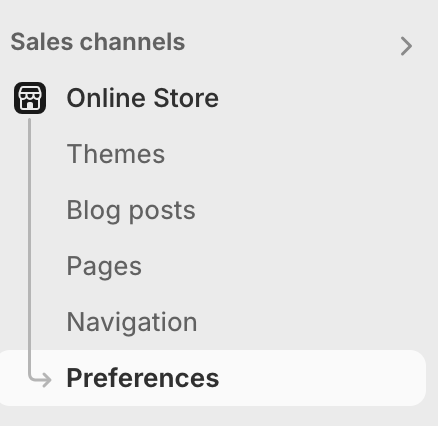
In the Google Analytics section, click Manage Pixel.

Click Connect your Google account.
In the Your Google Analytics property section, select the tag for the GA4 property that you want to connect to your Shopify store. (See picture on step 2)
Click Connect.
After you set up Google Analytics 4 tags, certain ecommerce events are tracked automatically. To learn more about event tracking in Google Analytics 4, refer to Setting up Google Analytics events. Here’s what’s tracked:
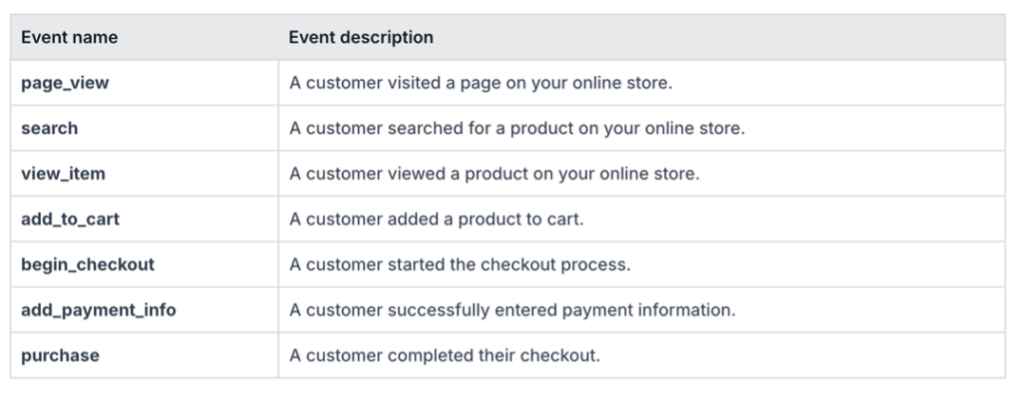
You’re all done. Now that GA4 has been set up, you will need to review that you are complying with consent mode, you can find out more in our handy blog.
Need help connecting and consolidating all your cross-channel data?
Whether you are advertising on Shopify, Google, Facebook, Amazon, or other platforms, ASK BOSCO® Marketing AI connects all your data for easy reporting and predicts where to allocate your media spend for maximum return, enabling you to plan budgets and forecast your future performance with 96% accuracy. If you’d like to find out more, please drop us a message at team@askbosco.com

