Follow our step-by-step guide to help you through the process of setting up Google Consent Mode v2 in Google Tag Manager – either in our handy video, or our steps and screenshots below.
Ensuring compliance with regulations regarding cookie usage is vital for any website featuring a cookie banner. This is why getting the new Consent Mode v2 properly set up in Google Tag Manager plays a crucial role. By properly configuring your cookie consent settings, you can ensure that your website meets the necessary standards for user privacy and data protection.
The process for setting up Google Consent Mode v2 in Google Tag Manager requires a few vital steps, but our data science team has handily put together a step-by-step guide below so that you can ensure that your user consent is respected when sharing data with third parties.
Google Consent Mode v2 Compliance
A bit of background: Cookie banners are designed to ensure you are complying with regulations. Google introduced Consent Mode v2 to work in conjunction with your website’s cookie banner and help you make sure you are only passing information onto other 3rd party providers that users visiting your site have consented to. Site owners are responsible for getting this set-up correctly.
Each cookie banner has different settings that the users consent to. Also, each tag in GTM requires different user permissions. So, this can get quite confusing pretty quickly!
As a result of this, if you are unsure what permissions you need to assign to each tag and what the settings from the cookie banner converts to in the gtag, it would be best to consult your DPO (Data Protection Officer) who should be able to give you advice. Alternatively, you can ask an independent expert who will be able to advise you – as this is different for every site.
Where to start with setting up gtags on Google Consent Mode v2?
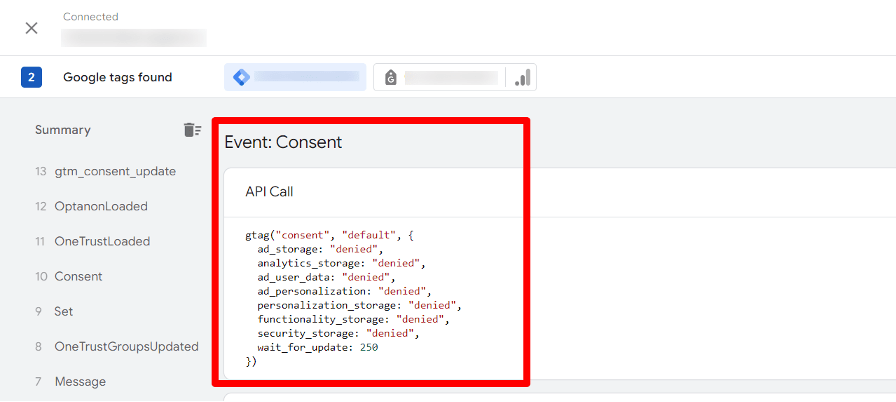
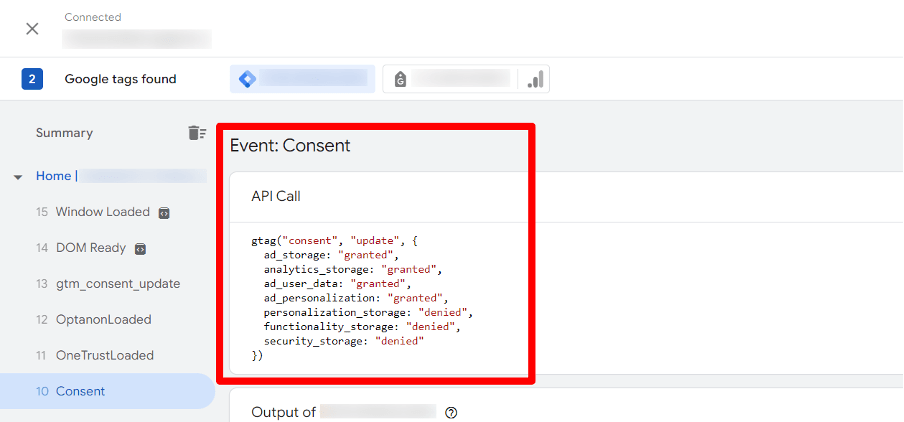
Before we begin our step-by-step guide to setting up Google Consent Mode v2 in Google Tag Manager, please ensure that the default position of your consent gtag is set to ‘denied’ when it fires. This should be set as default on every page regardless of the cookie consent being ‘accepted’ or `denied’. Once the user updates their consent, this should trigger another gtag with the update defining the user’s preferences. In the case of a returning user to your site who has already accepted the consent, you should see both the default and the update tag firing, with the update triggering the preferences based on what has been saved via a cookie on the user’s device.
Below is an example of the ‘default’ tag firing in GTM
And here is an example of what you should expect to see once the Consent has been updated.
Step by step guide to setting up Google Consent Mode v2 in GTM (Google Tag Manager)
Here is our step-by-step guide to ensuring that you have set up the new Consent Mode v2 in Google Tag Manager.
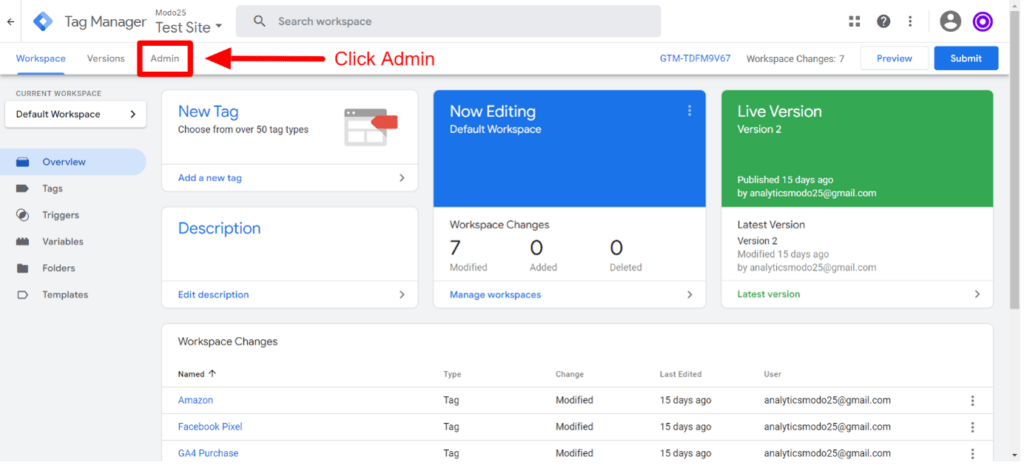
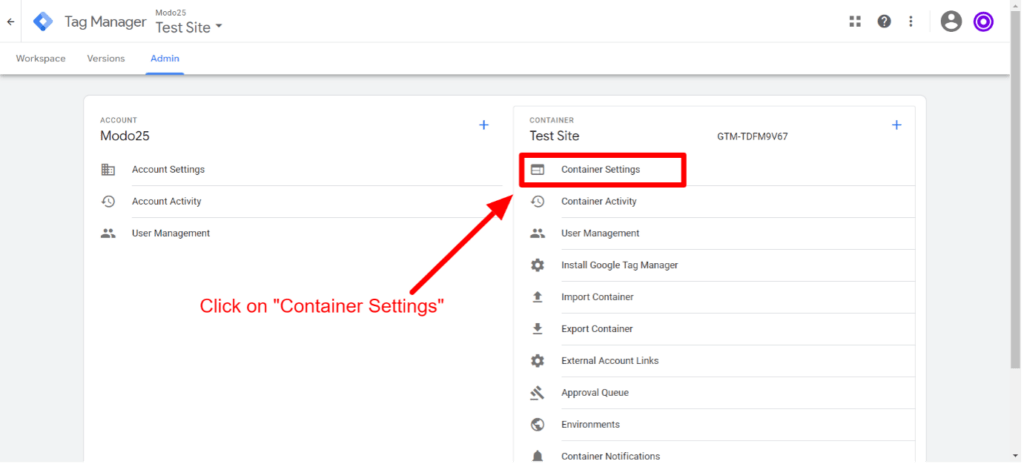
Step 1: Configure GTM to use Consent Mode – Click on Admin
Step 2: Next, click on Container Settings
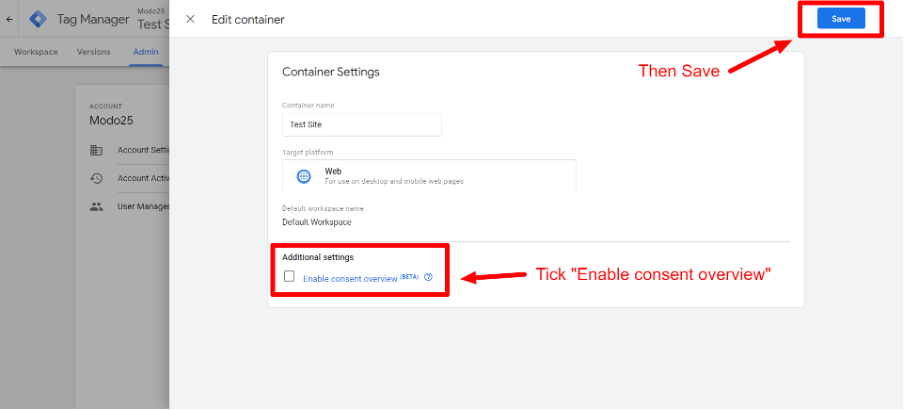
Step 3: Tick the Additional Settings box ‘Enable consent preview (BETA)’ – then click ‘Save’
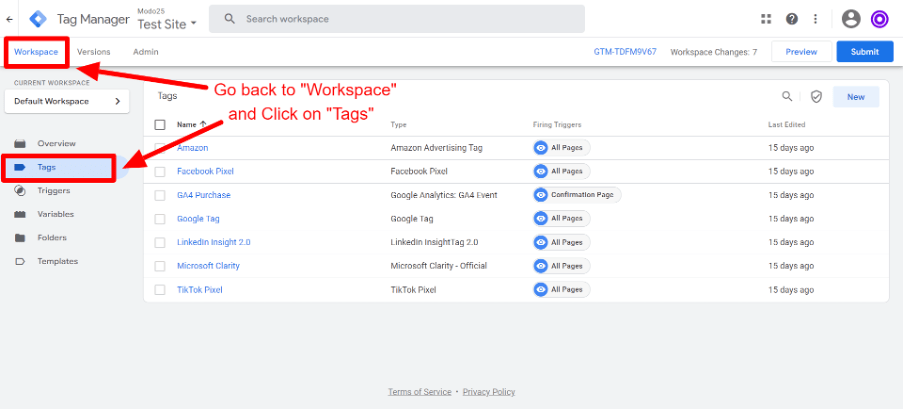
Step 4: Review all tags and their permissions.
Step 5: Go back to the workspace and click on ‘Tags’
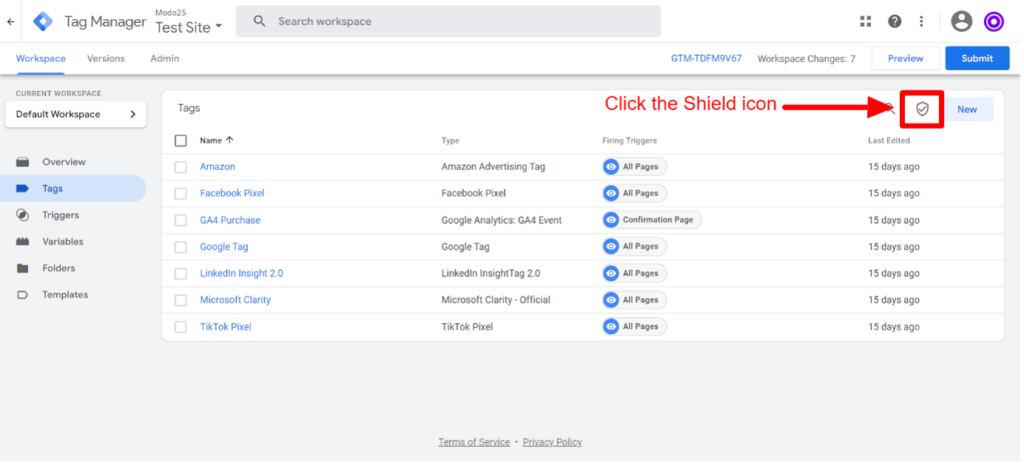
Step 6: Click the shield button in the top right-hand corner
This screen shows you where consent mode has not been configured.
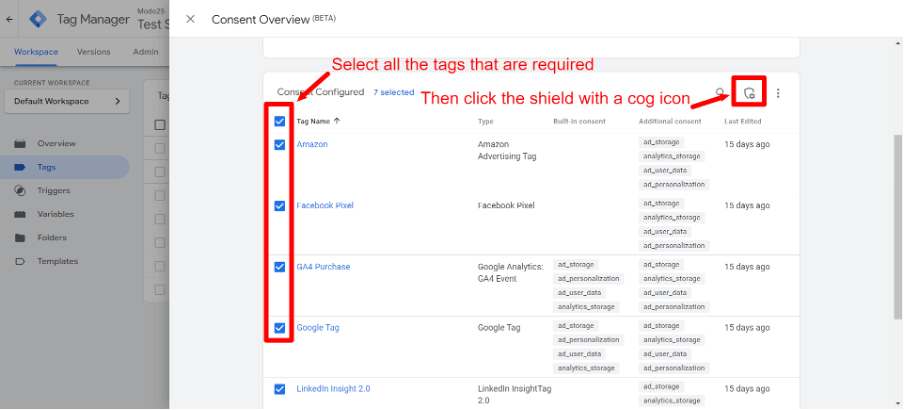
Step 7: Select all the tags that are required and then click on the shield with a cog in it in the top right-hand corner
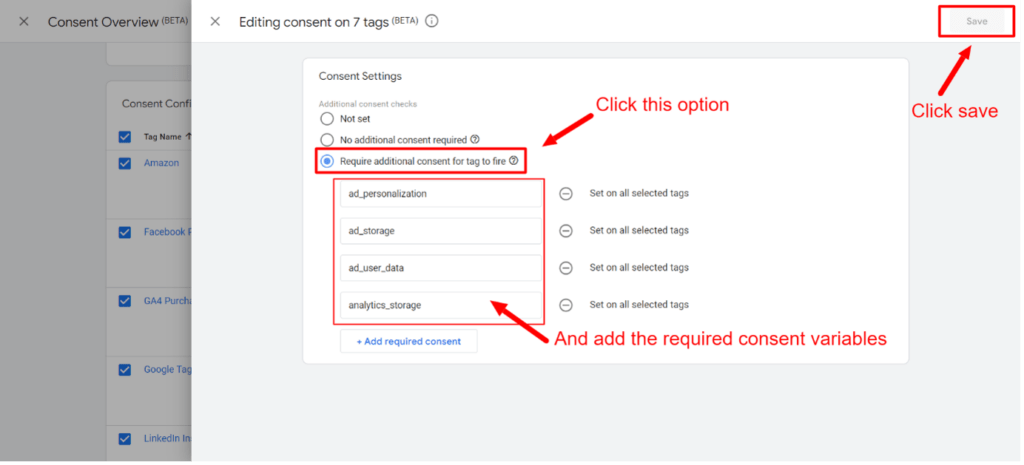
Step 8: Select the ‘Require additional consent for tag to fire’ check box. Then add the required consent variables – then click save.
NB: In addition to ‘ad_storage’ and ‘analytics_storage’, which were introduced with Google Consent mode v1, Google Consent Mode v2 also requires you to add ‘ad_user_data’ and ‘ad_personalization’.
Google Tags with Consent Mode:
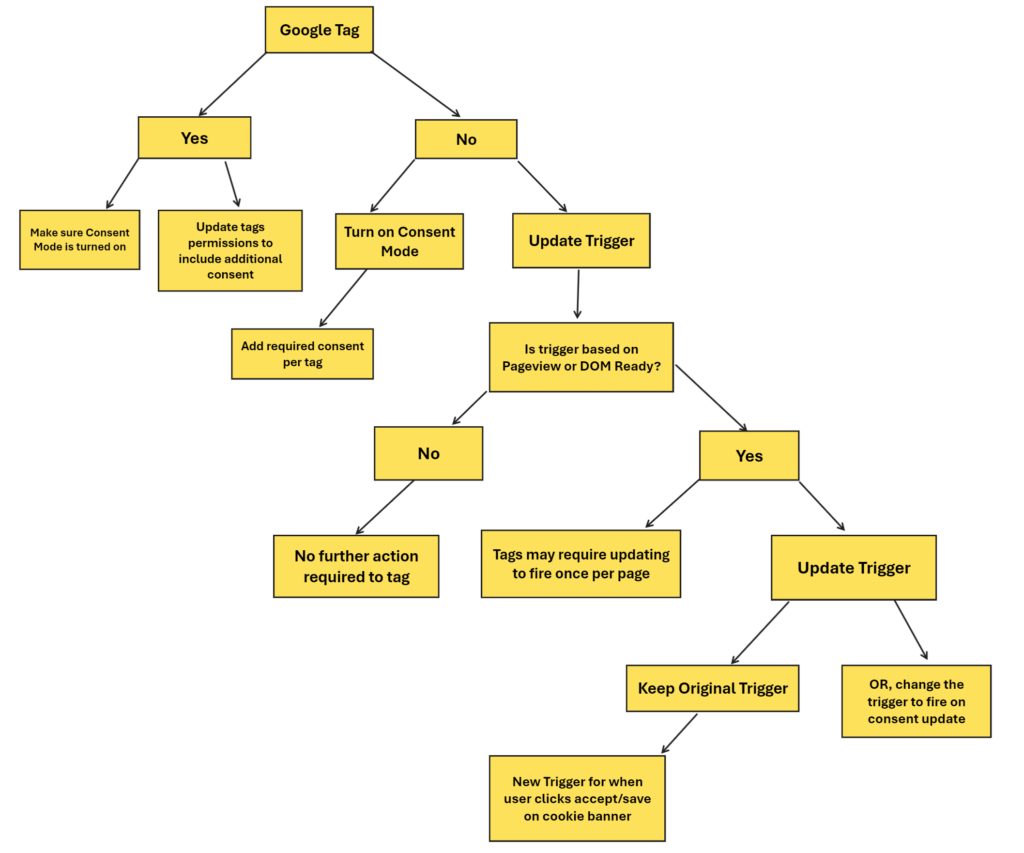
With Google’s Consent Mode v2, tags such as Google Analytics and Google Ads dynamically adjust their behaviour based on the user’s consent preferences. For instance, if a user does not consent to tracking, Google Analytics will automatically adapt to respect that preference, thereby limiting data collection to comply with regulations such as GDPR. These tags usually integrate seamlessly with Google Tag Manager, enabling you to manage consent-related configurations within GTM itself.
If these tags are not configured properly, they may fall under the “Not Configured” window in Google Tag Manager. To ensure proper functionality, make sure you configure these tags according to your consent management settings within GTM. This involves setting up triggers and variables to align with user consent preferences, ensuring compliance with data privacy regulations.
Non-Google Tags with Consent Mode:
Non-Google tags refer to any tags or scripts that are not specifically developed by Google, such as tags for third-party analytics or custom scripts for various functionalities. Implementing Google Consent Mode with non-Google tags might require more manual work. You may need to configure these tags to respect the consent preferences obtained through the consent management solution.
The graph below explains this:
Need help connecting and consolidating all your cross-channel data?
Whether you are advertising on Google, Facebook, TikTok, Amazon or other platforms, ASK BOSCO® Marketing AI connects all your data for easy reporting and predicts where to allocate your media spend for maximum return, enabling you to plan budgets and forecast your future performance with 96% accuracy. If you’d like to find out more, please drop us a message at team@askbosco.com

